041322
Iphone/IPad用sweet midi→最後1/4無法播放
android用MIDI樂譜→可看樂器譜及播放,我的舊IPad播放即退出app。
android用MIDI voyager→功能較全
032822
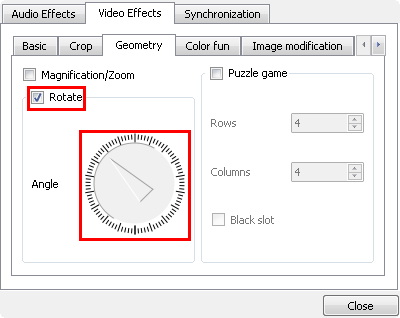
LMMS由.AppImage安裝後啟動,Import mid file no sound, 要改設定如下

Edit>Settings>Path, 1. soundfont 2. sf2 ok

可移調 transposition

032722
Rosegarden 20.04安裝同18.04,soundfont選用vlc-plugin-fluidsynth_3.0.11-0+deb9u2_amd64.deb安裝,安裝qsynthw11不安裝timgm6mb-soundfont,qsynth要開著

也可自軟体中心安裝Ardour(中文介面)→會話→import midi file
純播放mid檔用vlc
LMMS/Rosegarden/musescore可更換樂器
musescore最易安裝,自帶soundfont .sf3
LMMS 要指定 soundfont目錄及 .sf2
Rosgarden要開qsynth
121720不再更新
之前標題:midiplus 61 usb keyboard在ubuntu 18.04/12.04/10.4使用及配合Rosgerden可按keyboard編曲
062918
ubuntu 18.04參考在ubuntu系统下制作midi音乐_Linux教程_云网牛站
摘要如下
sudo apt-get update
sudo apt-get install fluidsynth jackd qjackctl qsynth
sudo apt-get install timgm6mb-soundfont
qsynth setup如下

option

然後安裝
sudo apt-get install rosegarden
Studio→Manage MIDI Devices

有連接到Tahorng
附上原手冊設定頁

MIDI樂器對照表找General MIDI 參數→旋律音色 (Melodic soundes)

以上只摘錄一部份
011012 (我加上的為斜体字)
配合Rosgerden可按keyboard編曲,請參考
setting up Rosegarden (for MIDI music) in Linux (Ubuntu 8.04)
摘要如下(1樓)
One confusing thing is that the programs kept referring to the JACK software. Although JACK seems to be versatile and powerful, I still haven't figured out how to use it after spending quite a bit of time on it --and you don't need it to run Rosegarden. So here's how I did it.
I found out that, like many Musical Instrument Digital Interface ("MIDI") applications, Rosegarden itself does not produce sound, and must tell a separate "midi synthesizer" what sounds to produce. This "midi synthesizer" can be software or hardware (if you have a sound card with midi). So the key is to:
1. get a midi synthesizer running
2. install a sound font
2. tell Rosegarden to send the music to that midi synthesizer
Step 1: Get a MIDI synthesizer running
You need to install a MIDI synthesizer program. You can install QSynth/FluidSynth. (Another alternative not covered here is TiMidity++.) QSynth is the GUI front-end that lets you easily control FluidSynth, which is the actual synthesizer. In Ubuntu (and probably most distros), if you install QSynth, it will automatically realize that you need FluidSynth to go with it, and install that program also. So, either open a terminal and type the command:
sudo apt-get install qsynth
or use Synaptic or whatever program. Other distros will have their own way of installing the qsynth package.
In a terminal, type the command "qsynth". This will activate QSynth. Unfortunately, it will also probably bring up an error message and complain that the JACK software isn't running. But all you need to do is tell it that you don't want to use JACK, so close the error message windows and:
- click the Setup button on the left (NOT the "Options" button on the right)
- click the Audio tab
- for Audio Driver, select "alsa" instead of "jack". (This changes the rest of the options on the screen.)
Step 2: Install a sound font
You need to get install a soundfont file. This tells QSynth what each instrument sounds like. There are various types of soundfont files; the kind gentleman who helped me pointed me to a small basic all-purpose soundfont file that contains the General Midi ("GM") standard 128 instruments. He gave me the file directly, but I'm told that it can be found here:
http://www.hammersound.com/cgi-bin/s...nerGi8.zip;436
However, you can also use the Ubuntu package "fluid-soundfont-gm". This file is about 140MB in size --presumably the instruments sound that much better! If you install that package, whether using the command "sudo apt-get install fluid-soundfont-gm" or using Synaptic, then the soundfont file will end up at:
/usr/share/sounds/sf2/FluidR3_GM.sf2
Remember this file location. Other distros might put it elsewhere; your package manager can tell you where the file is installed.
If you want to get a soundfont from somewhere else, I was told to try these web sites:
http://personalcopy.com/
http://personalcopy.com/linuxfiles.htm
or
http://hammersound.net/ ←
I checked out both sites. Hammersound seemed to have more specialized sounds that were better as add-ons, but I didn't find a general soundfont file for all-purpose use. PersonalCopy seemed to be better, but I didn't actually download their soundfont to try, so try at your own risk! Remember where you've put your downloaded file.
Once you have a soundfont file on your computer, tell QSynth where it is:
- click the Setup button on the left (NOT the "Options" button on the right)
- click the Soundfont tab
- click the Open button, and open your soundfont file
Now QSynth is ready to play your notes. You just need to get Rosegarden to tell it what notes to play!
Step 3: set up Rosegarden
In Ubuntu, you install Rosegarden with the command "sudo apt-get install rosegarden" or use Synaptic. Do whatever the equivalent is for your distro.
Before you run Rosegarden, make sure QSynth is already set up and running. Now go ahead and run Rosegarden. If it doesn't appear on your menu, you can type the "rosegarden" command at a terminal.
When you run Rosegarden, it will also complain that the JACK software is not running. Ignore it. Go to the Rosegarden main menu > Studio > Manage MIDI Devices. Under "Play devices", you can choose which MIDI device for "General MIDI Device" and "MIDI output system device". You might need to set up each of these two settings, but it worked for me when I just set the "General MIDI Device" one. It lets you choose a connection or "No connection". The available connections will NOT be marked "QSynth" so you have to figure out which is the correct one. Mine says "128:0 Synth input port" but maybe yours is different.
Okay, that's it! Rosegarden should now play actual sound to your speakers! Of course, make sure that your computer speakers are plugged in and the volume is high enough to hear. Grab a MIDI file or one of the included Rosegarden "RG" files (an RG file is a MIDI file with some added features) and play it to see if it works.
Some notes:
I found that when I loaded one of the RG files, it reset the MIDI output to the wrong connection, so I had to go back to main menu > Studio > Manage MIDI Devices > Play devices and change the General MIDI Output device to the right connection again.
Note that if you already have TiMidity++ running in the background, then QSynth won't work properly. While trying to get Rosegarden working, I ran TiMidity++ once --but after it was done, it stayed running in the background (as root!) and I found that things didn't work any more. It could be running the background without you realizing! You can check if it's running with the command:
ps -ef | grep timidity ←
If it comes back with only one line that says somewhere "grep timidity", then timidity is NOT running. If the response has more than one line, and one or more lines contain the word "timidity" but not "grep timidity", then timidity is running, and you need to use the command "sudo killall -s9 timidity" to get rid of it BEFORE you run QSynth.
In the same way, if the JACK software daemon is running in the background, it can make things confusing (since Rosegarden and QSynth will try to use it). If you know how to use JACK, go ahead. (And also tell *me* how to use it!) (And what are you doing reading this guide if you already know how to use JACK?) Otherwise, you can make sure the JACK daemon software is not running using a similar method:
ps -ef | grep jackd ←
If it comes back with only one line that says somewhere "grep jackd", then jackd is NOT running. If the response has more than one line, and one or more lines contain the word "jackd" but not "grep jackd", then jackd is running, and you need to use the command "sudo killall -s9 jackd" to get rid of it BEFORE you run QSynth.
If you already have a hardware MIDI synthesizer on your soundcard, then you don't need QSynth. I guess you would tell Rosegarden to use that connection under main menu > Studio > Manage MIDI Devices. If it doesn't work, then try it with QSynth anyway.
121211
midiplus 61 usb原廠只提供winows/Mac趨動,
在網路可找到一些相關資料
先lsusb看有無找到硬体,
再安裝jack control後如設定,connection(每次都要重設)
midi drive (seq)
預設midi/swlect program 1鋼琴聲,其他請參考第7,8頁
http://www.miditech.de/userfiles/site_Downloads_manuals_pianobox/manual-pianobox-english-german.pdf
參考取自
http://askubuntu.com/questions/19764/how-does-one-set-up-a-midi-keyboard